NAND Customization
Astra supports using NAND for the main internal storage with SL2610. The machine types sl2611nand, sl2615nand, and sl2619nand are configured to use a default 256MB SPI NAND (2K page size).
However, other NAND configurations can be used. This guide details how to modify the SDK to use different NAND configurations.
Changing the NAND Configuration
The NAND configuration is included in the synasdk-config-native` package. Use the devtool utility to
modify the config file:
devtool modify synasdk-config-native
The devtool utility will create the build-sl2619nand/workspace/sources/synasdk-config-native/configs/product directory which will contain the source for
the config package. In the product directory is a subdirectory containing a config file for each of the platforms. Modify the files
based on the sections below.
Changing the NAND Size
The NAND configuration is defined in the Image Generation Configuration of the profile defconfig file.
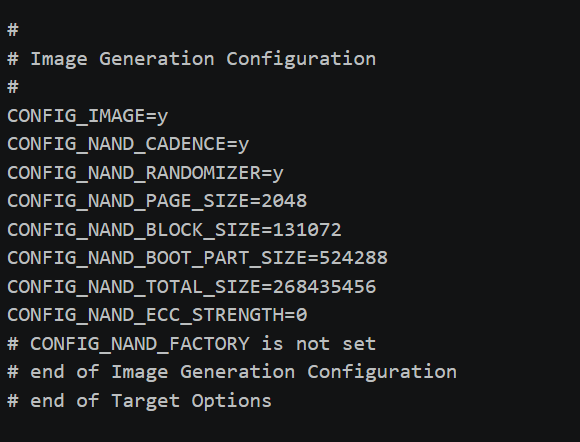
Image Generation Configuration section of the defconfig
Update the sizes for your specific NAND. For example, switching to a 512MB (4K) NAND requires updating the product config.
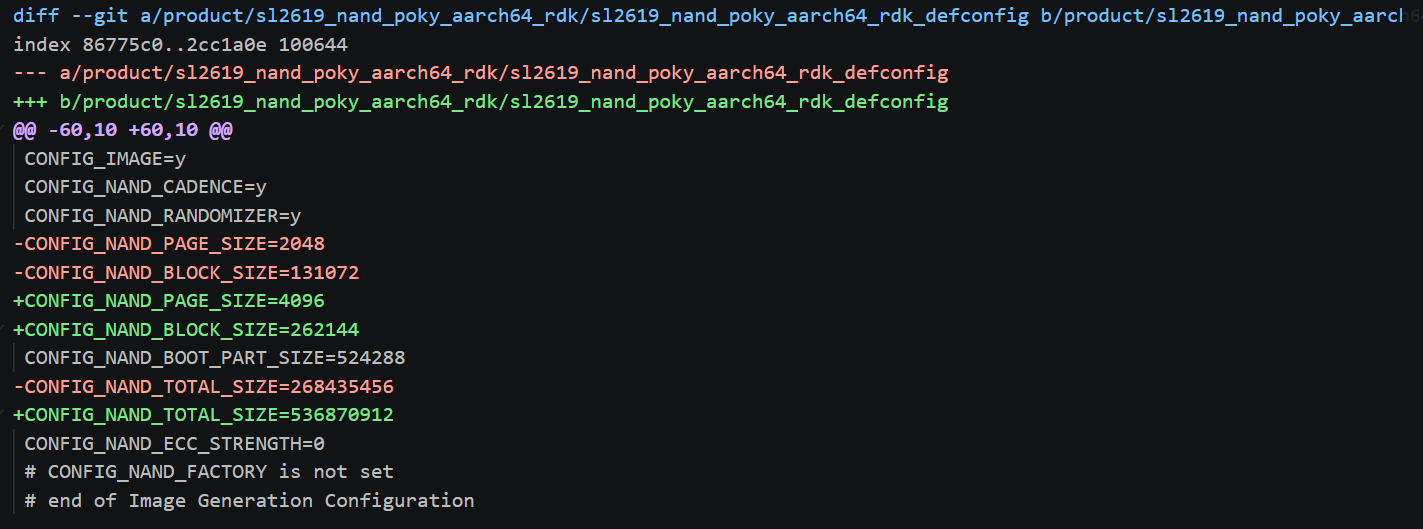
Patch updating sizes in sl2619_nand_poky_aarch64_rdk_defconfig.
Changing Partition Sizes
The NAND partition layout is set in the nand.pt file.
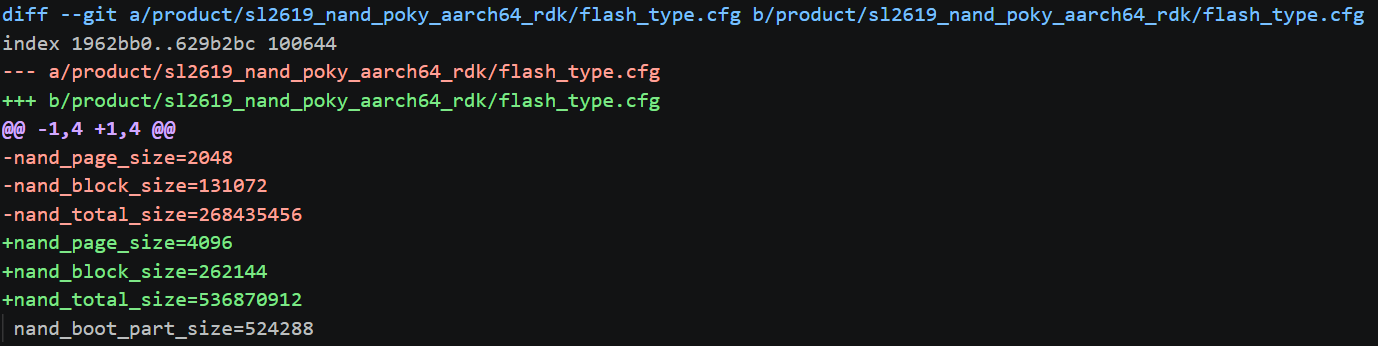
Updating the NAND Flash Type Configuration
Changing the Flash Type Configuration
The Flash Type configuration is stored in flash_type.cfg file.
Updating the NAND Flash Type Configuration
Building the Updated Image
Finally, build an image with the modified NAND configuration:
bitbake -f synasdk-config-native
bitbake -f syna-u-boot -c compile
bitbake -f linux-syna -c compile
bitbake -f astra-media -c compile
bitbake -f astra-media
The custom NAND image will be output to /path/to/workspace/sdk/build-sl2619nand/tmp/sl2619nand/deploy/images/sl2619nand/SYNAIMG/uNAND_full.img or something
similar based on the name of the machine type.
USB Boot with NAND support
You will also need to build a USB boot image with support for your NAND device in order to flash your custom NAND image over USB.
Building a custom USB boot image with NAND support
Please follow the instructions in Building Custom USB Boot Images and apply the appropriate NAND configuration.
The custom USB NAND image will be output to /path/to/workspace/sdk/build-sl2619usb/tmp/sl2619usb/deploy/images/sl2619usb/SYNAIMG or something
similar based on the name of the machine type.
Flashing the NAND image
Flashing the NAND image over USB uses the astra-boot tool which is part of the usb-tool / astra-update package. Information
on downloading the tool can be found in the user guide at Updating Software Images using USB.
Flashing the NAND image also requires a serial console to input commands at the U-Boot prompt. The user guide also has instructions for setting up the serial console at Setting up the Serial Console.
Unlike flashing eMMC or SPI images, flashing the NAND image requires booting over USB using the astra-boot tool.
First copy the USB boot image generated in the previous section to the usb-tool directory.
Second copy the uNAND_full.img to the USB boot SYNAIMG directory. astra-boot will load the image from this directory.
Finally, boot the device using astra-boot.
./bin/linux/astra-boot -k SYNAIMG
.\bin\win\astra-boot.exe -k SYNAIMG
The device will boot to the U-Boot prompt (=>). At the U-Boot prompt enter the following commands.
usbload uNAND_full.img 0x10000000
m2nand 0x10000000
This will load the uNAND_full.img image to address 0x10000000 and then program it to the NAND. U-Boot will
return to the prompt when the operation is complete. Then you may reboot the device.